Tag Manager lets you create simple, customizable labels (“tags”) and attach them to customers or invoices. Tags help you group, filter, and quickly find records based on categories you define (for example: VIP, Wholesale, premium, Project A, Cohort A).
Step-by-step: create and apply a tag
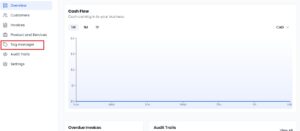
1. Open Tag Manager
a. Sign in to your Cordlo account.
b. From the left-hand navigation menu select Tag Manager
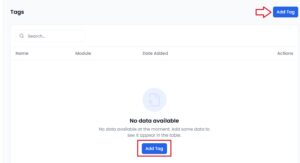
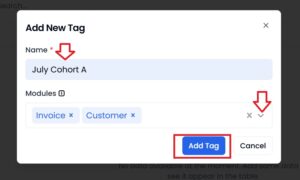
2. Add a new tag
Click Add Tag and fill in the tag details:
- Tag name: e.g. VIP, Project A, Cohort B, Q1-2025
- Module(s): choose from the dropdown — Customer, Invoice, or Both .
Result: The tag is now saved and available to assign to records in the chosen modules.
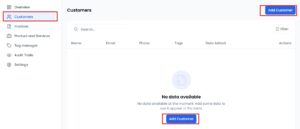
3. Assign the tag to customers
a. Go to Customers in the left menu and open the customer profile you want to tag.
b. Fill customer information and select the tag you created from the dropdown, then Save.
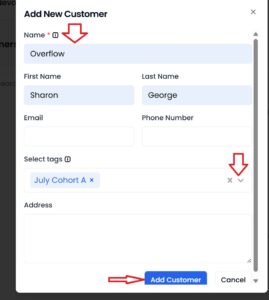
3b
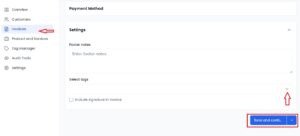
4. Assign the tag to invoices
a. Go to Invoices and Create a new invoice or Edit an existing one.
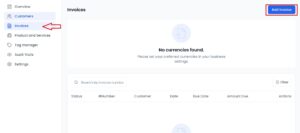
b. Scroll to the Settings area inside the invoice editor, select the tag from the Tag dropdown, then save.